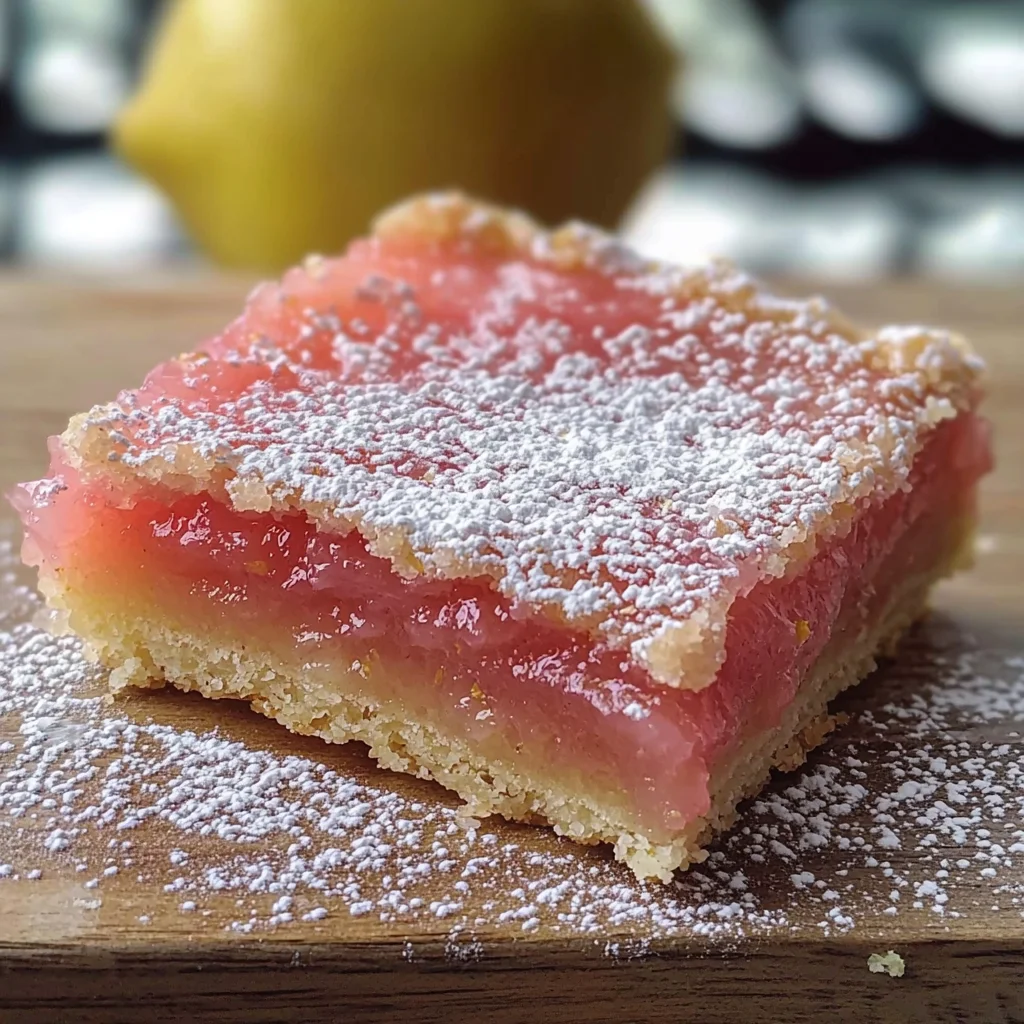
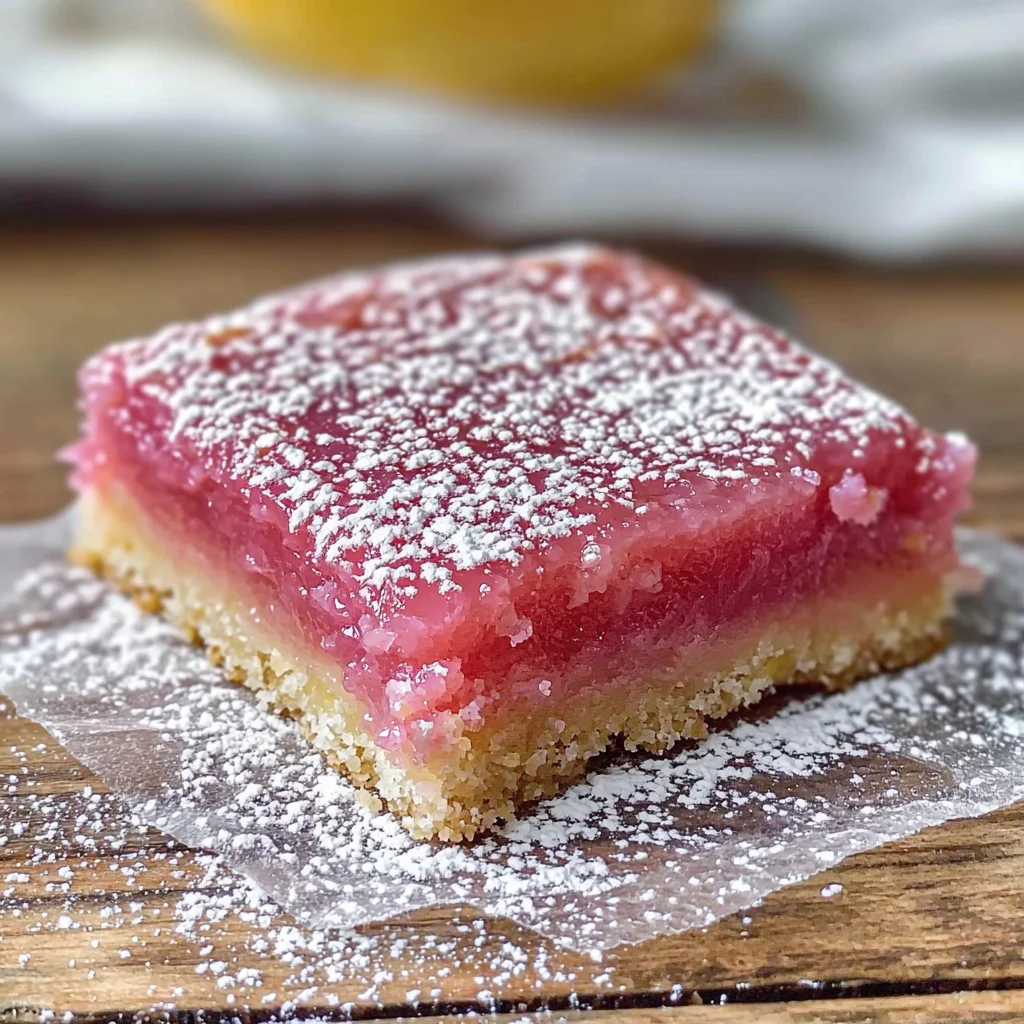
If you’re looking for a delightful twist on a classic dessert, these Hibiscus Lemon Bars are just the treat you need! Imagine sinking your teeth into a zesty lemon bar that bursts with the vibrant flavor of hibiscus. This recipe has quickly become a favorite in my home, perfect for everything from busy weeknights to cheerful family gatherings. The bright colors and refreshing taste make it an eye-catching dessert that everyone will love, and trust me, it’s as fun to make as it is to eat!
Whether you’re hosting friends or simply indulging in something sweet after dinner, these Hibiscus Lemon Bars are sure to impress. They’re simple enough for anyone to whip up, yet they have that special flair that makes them feel fancy. So let’s dive into this delightful recipe!
Why You’ll Love This Recipe
- Bright and Flavorful: The combination of tangy lemon and floral hibiscus creates a unique taste that’s both refreshing and delicious.
- Easy to Make: With straightforward steps, even beginner bakers can enjoy the satisfaction of creating something beautiful.
- Perfect for Sharing: These bars are great for potlucks, picnics, or just treating your loved ones — everyone loves a sweet surprise!
- Make Ahead Convenience: You can prepare them in advance for any occasion; they store well in the fridge and taste great chilled.
- Vegan-Friendly Option: By swapping out eggs with a plant-based alternative, you can easily cater to different dietary needs without sacrificing flavor.
Ingredients You’ll Need
This recipe calls for simple, wholesome ingredients that you likely already have in your pantry. Each one plays an important role in creating those delectable Hibiscus Lemon Bars.
For the Crust:
- 1/2 cup (1 stick) unsalted butter, room temperature
- 1/4 cup sugar
- 1 cup flour
- pinch of salt
- 1 tsp vanilla bean paste
For the Filling:
- 1/2 cup fresh squeezed lemon juice
- 1 Tbsp dried hibiscus or hibiscus tea
- 3 large eggs
- 1 1/2 cups sugar
- 1/2 cup flour
- confectioner’s sugar, for dusting
Variations
One of the best parts about baking is how flexible recipes can be! Here are some fun twists you might consider trying with these Hibiscus Lemon Bars:
- Add Fresh Berries: Toss in some diced strawberries or raspberries for extra fruitiness and texture.
- Try Different Citrus: Swap out lemon juice with lime or orange juice for a different citrusy zing.
- Make it Vegan: Substitute the eggs with flaxseed meal mixed with water (1 tablespoon flaxseed meal + 2.5 tablespoons water = 1 egg).
- Infuse with Herbs: Add finely chopped mint or basil to the filling for an aromatic twist that complements the flavors beautifully.
How to Make Hibiscus Lemon Bars
Step 1: Prep Your Oven and Crust
Set your oven to 350°F (175°C) so it’s nice and hot when you’re ready to bake. Start by creaming together the butter and sugar along with vanilla bean paste until light and fluffy. This step is crucial because it incorporates air into the mixture, giving your crust that lovely light texture. Then mix in flour and salt until just combined before pressing it evenly into your baking pan. Chilling it for 15 minutes helps firm up the dough before baking.
Step 2: Bake the Crust
Bake the crust for about 15 minutes until it’s lightly browned around the edges. This initial bake gives your crust a sturdy base so it holds up against the luscious filling you’ll create next.
Step 3: Prepare the Hibiscus Filling
While your crust cools down, stir dried hibiscus into fresh lemon juice and let it sit for about 15 minutes until it’s a beautiful dark pink color. Straining out the hibiscus leaves you with just that gorgeous flavor without any bits in your filling.
Step 4: Mix Your Filling
In another bowl, whisk together eggs and sugar until well blended. This helps dissolve the sugar fully — no one likes grainy bars! Then stir in your strained lemon-hibiscus juice followed by flour. It’s important to mix until smooth so every bite of your bars is consistently delicious.
Step 5: Bake Again
Pour that dreamy filling over your pre-baked crust and return everything to the oven. Bake again for another 20–25 minutes until set — you want it firm but not jiggly in the middle! It’ll puff slightly as it bakes but will settle as it cools.
Step 6: Cool and Serve
Let those beautiful bars cool completely before slicing them into squares. Dust each piece with confectioner’s sugar right before serving to add a touch of elegance! Enjoy every sweet bite of your homemade Hibiscus Lemon Bars!
Pro Tips for Making Hibiscus Lemon Bars
Making Hibiscus Lemon Bars is a delightful experience, and these tips will help ensure your bars turn out perfectly every time!
- Use fresh ingredients – Fresh lemons and high-quality hibiscus will enhance the flavor of your lemon bars, making them vibrant and refreshing.
- Chill the crust – Chilling the crust before baking helps it hold its shape better and prevents it from becoming too crumbly when cut.
- Don’t overbake – Keep an eye on the baking time; overbaking can lead to a dry filling. The center should remain slightly jiggly when you take it out of the oven.
- Let them cool completely – Allowing your Hibiscus Lemon Bars to cool fully before slicing ensures clean cuts and prevents the filling from running.
- Dust with powdered sugar just before serving – This keeps the sugar from absorbing moisture and maintains that beautiful presentation.
How to Serve Hibiscus Lemon Bars
Presenting your Hibiscus Lemon Bars beautifully can make all the difference when serving. Here are some ideas to elevate your dessert experience!
Garnishes
- Fresh mint leaves – A few sprigs of mint add a pop of color and a hint of freshness that complements the tartness of the bars.
- Zest of lemon – Sprinkle some grated lemon zest on top for an extra burst of citrus aroma that enhances the overall flavor profile.
Side Dishes
- Vanilla ice cream – The creaminess of vanilla ice cream contrasts wonderfully with the tangy lemon bars, creating a delicious balance.
- Berries medley – A mix of fresh strawberries, blueberries, and raspberries not only adds color but also provides a juicy element that pairs nicely with the tartness.
- Whipped coconut cream – A dairy-free option that adds a light, fluffy texture and enhances the tropical notes from the hibiscus.
- Tea or herbal infusions – A warm cup of chamomile or hibiscus tea can complement these bars beautifully while echoing their flavors.
Make Ahead and Storage
These Hibiscus Lemon Bars are perfect for meal prep! You can easily make them ahead of time and store them for later enjoyment.
Storing Leftovers
- Wrap the lemon bars tightly in plastic wrap or store them in an airtight container.
- Keep them in the refrigerator, where they will stay fresh for up to one week.
- If you want to keep them longer, consider freezing them.
Freezing
- To freeze, slice the bars and place them in a single layer on a baking sheet.
- Once frozen solid, transfer them to a freezer-safe container or zip-top bag.
- They can be stored in the freezer for up to three months.
Reheating
- For best results, let the frozen bars thaw in the refrigerator overnight.
- If you prefer them slightly warm, pop them in a preheated oven at 350°F (175°C) for about 10 minutes.
- Dust with powdered sugar before serving for that fresh-out-of-the-oven feel!
FAQs
Have questions about making these delicious Hibiscus Lemon Bars? Here are some common inquiries:
Can I use fresh hibiscus flowers instead of dried?
Yes! If you have access to fresh hibiscus flowers, you can use them instead. Just make sure they are clean and thoroughly rinsed before adding to your lemon juice.
How do I know when my Hibiscus Lemon Bars are done baking?
The bars are done when the center is set and no longer jiggly. A toothpick inserted should come out clean or with only a few crumbs attached.
Can I substitute any ingredients in the Hibiscus Lemon Bars?
Absolutely! You can substitute coconut oil for butter, or use a gluten-free flour blend if you’re looking for a gluten-free option. Just ensure that your substitutions maintain similar textures and flavors.
Final Thoughts
I hope you enjoy making these delightful Hibiscus Lemon Bars as much as I do! The combination of tangy lemon and floral hibiscus creates a unique treat that’s sure to brighten your day. Remember, baking is all about having fun and experimenting, so don’t hesitate to make this recipe your own. Happy baking!
Hibiscus Lemon Bars
Hibiscus Lemon Bars are a delightful dessert that combines the tangy brightness of fresh lemons with the floral notes of hibiscus, creating a refreshing treat perfect for any occasion. These bars are not only visually stunning with their vibrant pink hues, but they also offer a unique flavor profile that will impress your family and friends. Easy to make and adaptable for various dietary needs, these bars are ideal for potlucks, picnics, or simply to enjoy at home. With straightforward steps and accessible ingredients, baking these Hibiscus Lemon Bars is as enjoyable as savoring each sweet-tart bite!
- Prep Time: 20 minutes
- Cook Time: 35 minutes
- Total Time: 55 minutes
- Yield: Approximately 12 servings 1x
- Category: Dessert
- Method: Baking
- Cuisine: American
Ingredients
- 1/2 cup (1 stick) unsalted butter, room temperature
- 1/4 cup sugar
- 1 cup all-purpose flour
- pinch of salt
- 1 tsp vanilla bean paste
- 1/2 cup fresh squeezed lemon juice
- 1 Tbsp dried hibiscus or hibiscus tea
- 3 large eggs or plant-based alternative
- 1 1/2 cups sugar
- 1/2 cup flour
- confectioner's sugar, for dusting
Instructions
- Preheat your oven to 350°F (175°C).
- Cream together unsalted butter and sugar until light and fluffy, then add vanilla bean paste.
- Mix in flour and salt until just combined; press into a baking pan and chill for 15 minutes.
- Bake the crust for about 15 minutes until lightly browned.
- Combine dried hibiscus with fresh lemon juice; let sit for 15 minutes before straining.
- In a separate bowl, whisk together eggs and sugar until smooth; mix in strained lemon-hibiscus juice and flour.
- Pour filling over the baked crust and return to the oven, baking for 20–25 minutes until set.
- Cool completely before slicing and dust with confectioner's sugar before serving.
Nutrition
- Serving Size: 1 serving
- Calories: 210
- Sugar: 18g
- Sodium: 45mg
- Fat: 8g
- Saturated Fat: 5g
- Unsaturated Fat: 3g
- Trans Fat: 0g
- Carbohydrates: 34g
- Fiber: 1g
- Protein: 2g
- Cholesterol: 30mg