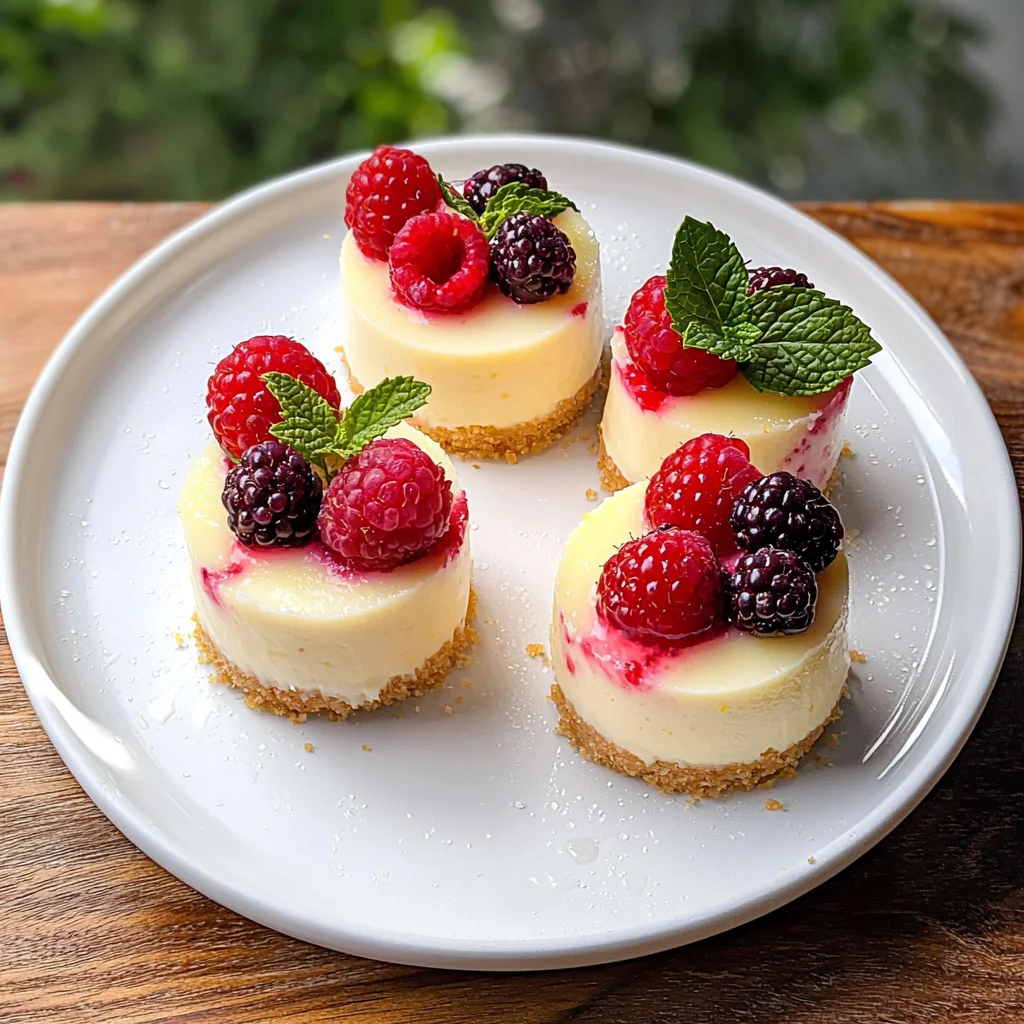
If you’re looking for a delightful dessert that feels indulgent yet is packed with protein, these Mini Protein Cheesecakes are just the treat! This recipe has become a favorite in my home because not only do they satisfy sweet cravings, but they’re also a guilt-free option perfect for busy weeknights or family gatherings. With their creamy texture and buttery crust, they offer a taste of classic cheesecake while being an excellent choice for those wanting to enjoy dessert without compromising on health.
These little gems are also incredibly versatile, making them suitable for any occasion — whether you’re hosting friends or just treating yourself after a long day. Plus, with over 9 grams of protein per serving, you can indulge without any guilt!
Why You’ll Love This Recipe
- Healthy indulgence: These mini cheesecakes provide a rich flavor while keeping things light and nutritious.
- Quick and easy preparation: With simple steps and just 10 minutes of prep time, you’ll have these ready to bake in no time!
- Family-approved: Even the pickiest eaters will love these delicious little bites.
- Make-ahead convenience: They chill beautifully in the fridge, making them ideal for meal prep or last-minute gatherings.
- Customize to your taste: You can easily play around with flavors or toppings to make each batch unique!
Ingredients You’ll Need
Making these Mini Protein Cheesecakes is so simple with wholesome ingredients you might already have at home. Here’s what you’ll need to whip up this delightful dessert:
For the Crust
- 1 ½ cups graham cracker crumbs (gluten-free if needed (about 10 sheets))
- 5 Tbsp salted butter (melted)
For the Filling
- 8 oz cream cheese (room temperature (regular or low-fat if desired))
- ¾ cup plain 0% Greek yogurt (room temperature)
- ⅓ cup granulated sugar
- 1 egg + 1 yolk
- 1 tsp vanilla extract
- 2 tsp lemon juice
- ¼ – ½ tsp lemon zest (optional if you want a lemony cheesecake)
- 1 Tbsp arrowroot starch or cornstarch
Variations
One of the best things about Mini Protein Cheesecakes is their flexibility! You can easily switch up ingredients or toppings to suit your mood.
- Add some flavor: Try mixing in different extracts like almond or coconut for a unique twist.
- Swap the protein: Use flavored Greek yogurt for an extra boost of sweetness and flavor.
- Go fruity: Top with fresh berries, sliced bananas, or even a drizzle of honey for added flavor.
- Vegan-friendly option: Substitute cream cheese with vegan cream cheese and use flax eggs instead of regular eggs.
How to Make Mini Protein Cheesecakes
Step 1: Preheat Your Oven
Start by preheating your oven to 350°F. This ensures that your cheesecakes cook evenly and set perfectly!
Step 2: Make the Crust
In a food processor, pulse the graham crackers until they resemble fine crumbs. Then, add in the melted butter and pulse again until everything combines nicely. If you don’t have a processor, simply place the crackers in a plastic bag and crush them with a rolling pin — it’s fun and works just as well! Divide the mixture into 12 cupcake liners, pressing down firmly to create an even base.
Step 3: Bake the Crust
Pop those crusts into your preheated oven and let them bake for about 5-6 minutes. This step is crucial as it helps solidify the crust before adding the filling.
Step 4: Prepare the Filling
While your crust cools slightly, grab a large mixing bowl and add room temperature cream cheese. Beat it with an electric mixer until smooth — this will ensure there are no lumps! Next, mix in Greek yogurt, egg, yolk, sugar, vanilla extract, lemon juice, lemon zest (if using), and arrowroot starch. Keep it on low speed; we don’t want to overmix here!
Step 5: Fill the Cups
Carefully divide your creamy filling among the muffin liners on top of that beautiful crust. Don’t be shy; fill them generously!
Step 6: Bake Again
Return your mini cheesecakes to the oven for about 17-20 minutes. You’ll know they’re done when they look set but still slightly jiggly in the center — perfection!
Step 7: Chill Out
Let your cheesecakes cool at room temperature for about 30 minutes before transferring them to the fridge. They need at least three hours to chill completely — this helps develop their delicious texture.
Step 8: Serve and Enjoy!
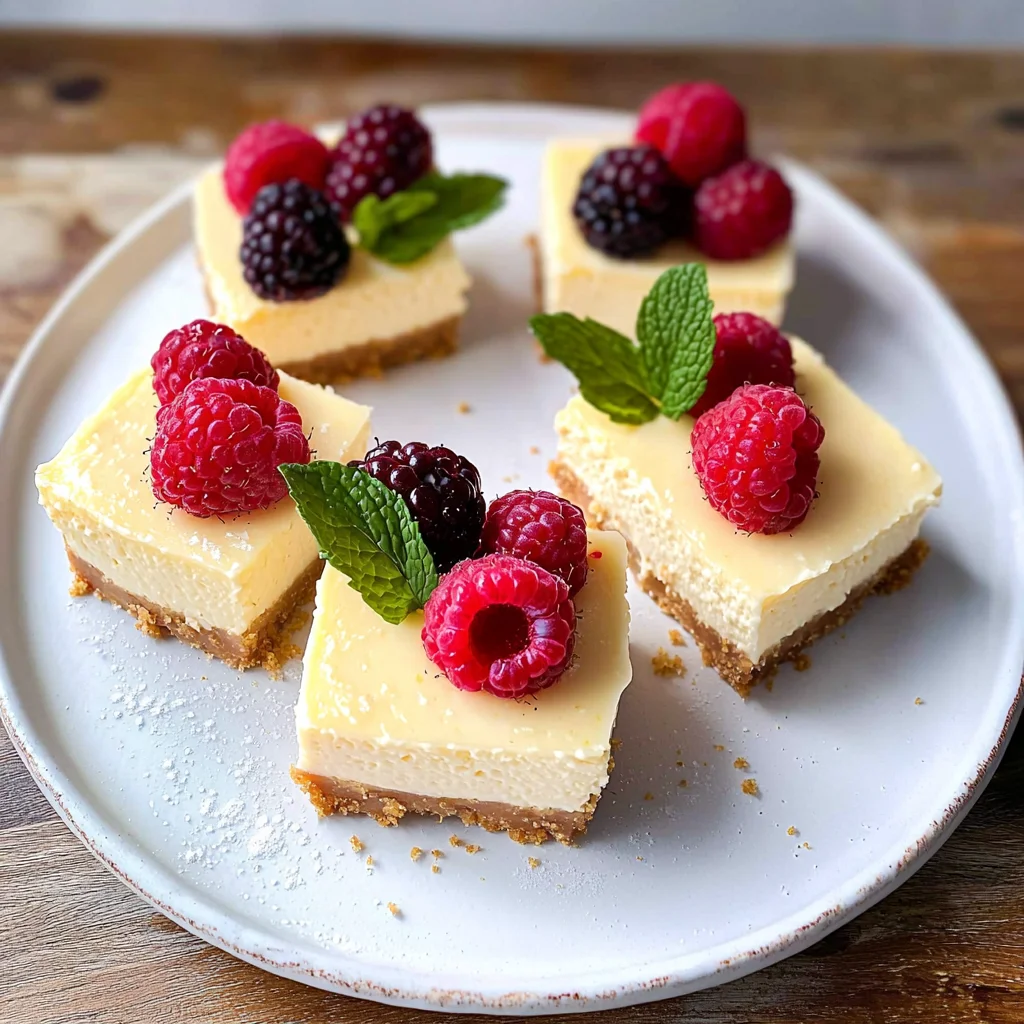
Once chilled, top with fresh berries and mint leaves if you like. Then dive right in! These Mini Protein Cheesecakes are sure to become a new favorite dessert in your home!
Pro Tips for Making Mini Protein Cheesecakes
Making mini protein cheesecakes is easy, but these pro tips will ensure they turn out perfectly every time!
Use room temperature ingredients: Allowing cream cheese and Greek yogurt to reach room temperature helps them blend more easily, resulting in a smoother filling without lumps.
Don’t overmix the batter: Mixing just until combined prevents air bubbles from forming, which can cause cracks in your cheesecakes as they bake.
Cool gradually: Letting the cheesecakes cool at room temperature before refrigerating helps to prevent condensation, which can make the tops soggy.
Experiment with flavors: Feel free to add different extracts or spices like almond extract or cinnamon for a unique twist on your cheesecake flavor!
How to Serve Mini Protein Cheesecakes
Presenting your mini protein cheesecakes can be as delightful as making them! Here are some ideas to elevate your dessert experience.
Garnishes
- Fresh berries: Strawberries, blueberries, or raspberries add a pop of color and a burst of freshness that complements the creamy texture.
- Mint leaves: A few small mint leaves not only enhance the visual appeal but also introduce a refreshing aroma with each bite.
Side Dishes
- Greek yogurt parfait: Layered Greek yogurt with granola and fresh fruit creates a nutritious side that balances the sweetness of the cheesecake.
- Fruit salad: A light fruit salad with seasonal fruits provides a refreshing contrast and adds natural sweetness to your dessert plate.
- Nut butter dip: Serve with sliced apples or bananas alongside nut butter for dipping; this adds a crunchy texture and healthy fats that complement the cheesecakes beautifully.
- Tea or coffee: Pairing your mini cheesecakes with a warm cup of herbal tea or coffee enhances the overall experience and makes for a cozy treat.
Make Ahead and Storage
These Mini Protein Cheesecakes are perfect for meal prep, allowing you to enjoy a delicious and healthy dessert throughout the week.
Storing Leftovers
- Store any leftovers in an airtight container in the refrigerator.
- They will stay fresh for up to 5 days.
- If you want to keep them longer, consider freezing them.
Freezing
- To freeze, place the cheesecakes in a single layer on a baking sheet.
- Once frozen solid, transfer them to a freezer-safe container or bag.
- They can be frozen for up to 2 months.
Reheating
- Thaw frozen cheesecakes overnight in the refrigerator before enjoying.
- For a warm treat, you can microwave them for about 10-15 seconds.
FAQs
Can I make Mini Protein Cheesecakes without eggs?
Yes! You can replace the eggs with a flaxseed meal mixture (1 tablespoon of flaxseed meal mixed with 2.5 tablespoons of water per egg) for a vegan alternative.
How much protein is in each Mini Protein Cheesecake?
Each cheesecake contains over 9 grams of protein, making it a great healthy dessert option!
Can I use flavored Greek yogurt for these Mini Protein Cheesecakes?
Absolutely! Using flavored Greek yogurt can add an extra twist to your cheesecakes. Just be mindful of the added sugars.
How do I know when my Mini Protein Cheesecakes are done baking?
They should be set and not jiggle in the center when gently shaken. A slight golden color around the edges is also a good indicator.
Final Thoughts
I hope you enjoy making these Mini Protein Cheesecakes as much as I do! They’re not only delicious but also packed with protein for that guilt-free indulgence. Whether it’s for meal prep or special occasions, these little treats are sure to impress. Happy baking!
Mini Protein Cheesecakes
Mini Protein Cheesecakes are the perfect blend of indulgence and nutrition, making them an ideal dessert for any occasion. These bite-sized treats boast a velvety texture and a buttery crust, allowing you to savor the classic cheesecake experience without the guilt. With over 9 grams of protein per serving, they satisfy your sweet tooth while keeping your health goals on track. Quick to prepare in just 10 minutes, these cheesecakes are family-approved and versatile, making them suitable for meal prep or last-minute gatherings. Customize each batch with your favorite flavors or toppings for a unique twist every time!
- Prep Time: 10 minutes
- Cook Time: 25 minutes
- Total Time: 35 minutes
- Yield: Makes approximately 12 servings 1x
- Category: Dessert
- Method: Baking
- Cuisine: American
Ingredients
- 1 ½ cups graham cracker crumbs
- 5 Tbsp salted butter (melted)
- 8 oz cream cheese (room temperature)
- ¾ cup plain Greek yogurt (room temperature)
- ⅓ cup granulated sugar
- 1 egg + 1 yolk
- 1 tsp vanilla extract
- 2 tsp lemon juice
- 1 Tbsp arrowroot starch or cornstarch
Instructions
- Preheat oven to 350°F.
- For the crust, pulse graham crackers into crumbs, mix with melted butter, and press into cupcake liners.
- Bake crusts for 5-6 minutes until set.
- In a bowl, beat cream cheese until smooth. Add Greek yogurt, egg, sugar, vanilla, lemon juice, and arrowroot starch; mix until combined.
- Fill cupcake liners with the cheesecake mixture and bake for 17-20 minutes until set but slightly jiggly.
- Cool at room temperature for 30 minutes before chilling in the fridge for at least three hours.
- Serve topped with fresh berries or other desired toppings.
Nutrition
- Serving Size: 1 serving
- Calories: 130
- Sugar: 8g
- Sodium: 150mg
- Fat: 7g
- Saturated Fat: 4g
- Unsaturated Fat: 3g
- Trans Fat: 0g
- Carbohydrates: 12g
- Fiber: <1g
- Protein: 9g
- Cholesterol: 40mg