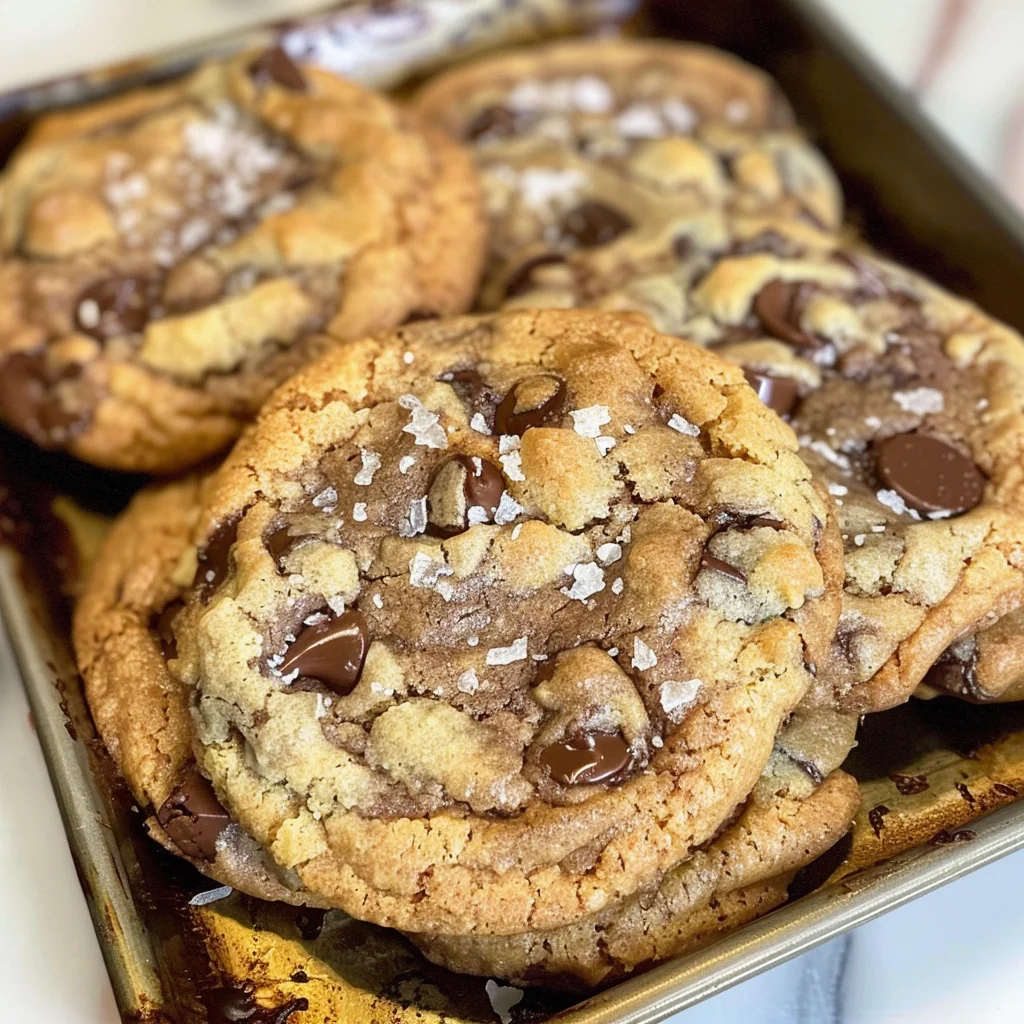
If you’re looking for a fun and delicious treat that will bring smiles to everyone in the family, then these Ice Cream Cone Cookies are just the thing! With bits of crunchy ice cream cones, gooey chocolate chips, and swirls of hot fudge, these cookies are a delightful twist on a classic dessert. They’re perfect for busy weeknights when you need something sweet to brighten your day or for family gatherings where you want to impress your loved ones with something unique.
This recipe is not only easy to follow but also allows for creative variations, making it a go-to favorite in my kitchen. Whether you’re baking for a cozy night in or a summer picnic, these Ice Cream Cone Cookies will surely be a hit!
Why You’ll Love This Recipe
- Quick and Easy: With just 15 minutes of prep time, you can whip up these cookies in no time!
- Family-Friendly Appeal: Everyone loves cookies, especially ones that incorporate fun ingredients like ice cream cones and hot fudge.
- Make-Ahead Convenience: Prepare the dough ahead of time and bake fresh cookies whenever you want a sweet treat.
- Delicious Flavor: The combination of buttery cookies with chocolate chips and fudgy swirls creates an irresistible flavor explosion.
- Customizable Fun: Feel free to tweak the recipe with your favorite mix-ins or toppings!
Ingredients You’ll Need
These Ice Cream Cone Cookies use simple, wholesome ingredients that you probably have on hand! Let’s gather what we need to create these delightful treats.
For the Cookies
- ½ cup butter
- ¾ cup brown sugar
- ¼ cup granulated sugar
- 1 large egg
- 2 tsp vanilla
- ½ tsp baking powder
- ½ tsp baking soda
- ½ tsp salt
- 1½ cups all-purpose flour
- ½ cup chocolate chips
- 2 sugar or waffle cones
- 3 tbsp hot fudge (chilled or frozen)
- flaked salt for topping
Variations
This recipe is wonderfully flexible, allowing you to get creative based on your personal preferences or what you have at home. Here are some fun ideas!
- Add nuts: Mix in chopped nuts like walnuts or pecans for an extra crunch.
- Swap the chocolate: Use white chocolate chips or even butterscotch chips if you prefer a different flavor.
- Make it festive: Add sprinkles into the dough for a colorful touch that’s great for parties or holidays.
- Go gluten-free: Substitute all-purpose flour with your favorite gluten-free blend to suit dietary needs.
How to Make Ice Cream Cone Cookies
Step 1: Preheat Your Oven
Start by preheating your oven to 375°F (190°C). This step is crucial as it ensures that your cookies bake evenly and develop that perfect golden-brown color.
Step 2: Cream Butter and Sugars
In a stand mixer fitted with a paddle attachment, combine the butter and sugars. Beat on medium-high speed until the mixture becomes light and fluffy—this usually takes about 3 to 4 minutes. This process incorporates air into the dough, giving your cookies that lovely chewy texture.
Step 3: Add Egg and Vanilla
Next, add in the egg and vanilla extract. Mix on low speed until everything is well combined. The egg acts as a binder while adding moisture, which is essential for achieving that soft cookie center.
Step 4: Combine Dry Ingredients
Gradually mix in the dry ingredients—baking powder, baking soda, salt, and flour. Be careful not to over-mix; it’s perfectly fine if there are still some flour remnants around. Over-mixing can lead to tough cookies!
Step 5: Fold in Chocolate Chips and Cone Pieces
Now comes the fun part! Gently fold in the chocolate chips and break up your ice cream cones into small pieces before adding them too. Finally, dollop three tablespoons of hot fudge onto the dough and swirl it gently—be cautious not to over-stir; you want those beautiful marbled swirls!
Step 6: Scoop Dough onto Baking Sheets
Using a large scoop (about 4 tablespoons), portion out cookie balls onto lined baking sheets. Leave enough space between them as they will spread while baking.
Step 7: Bake and Enjoy!
Sprinkle flaked salt over each cookie before placing them in the oven. Bake for 11-14 minutes or until the edges turn golden brown. Once out of the oven, use a spoon or spatula around the edges to shape them into perfect circles if needed. Enjoy warm with an extra sprinkle of salt if desired!
Pro Tips for Making Ice Cream Cone Cookies
Making the perfect Ice Cream Cone Cookies can be a breeze with these helpful tips!
- Use room temperature butter – This helps create a light and fluffy texture, ensuring your cookies are soft and chewy.
- Don’t overmix the dough – Mixing just until combined preserves the tenderness of the cookies, keeping them from becoming tough or dense.
- Chill the dough if needed – If your dough feels too sticky, chilling it for about 30 minutes can make it easier to scoop and shape.
- Monitor baking time closely – Ovens can vary in temperature; checking a minute or two early ensures you achieve that perfect golden edge without overbaking.
- Experiment with mix-ins – Feel free to swap chocolate chips for other favorites like nuts or dried fruit to personalize your cookies!
How to Serve Ice Cream Cone Cookies
These delightful treats are as fun to present as they are to eat! Here are some ideas on how to showcase your Ice Cream Cone Cookies.
Garnishes
- Drizzle of chocolate sauce – A simple drizzle adds an extra touch of sweetness and visual appeal.
- Sprinkle of colorful sprinkles – These add a festive touch, making the cookies perfect for celebrations or parties.
Side Dishes
- Vanilla ice cream – A classic pairing that complements the cookie’s flavors beautifully; serve them together for a delightful dessert experience.
- Fresh fruit salad – The freshness of seasonal fruits offers a refreshing contrast to the rich cookie, enhancing your dessert spread.
- Milk or non-dairy milk – A cold glass of milk (or its alternative) is perfect for dipping and balancing the sweetness of the cookies.
Make Ahead and Storage
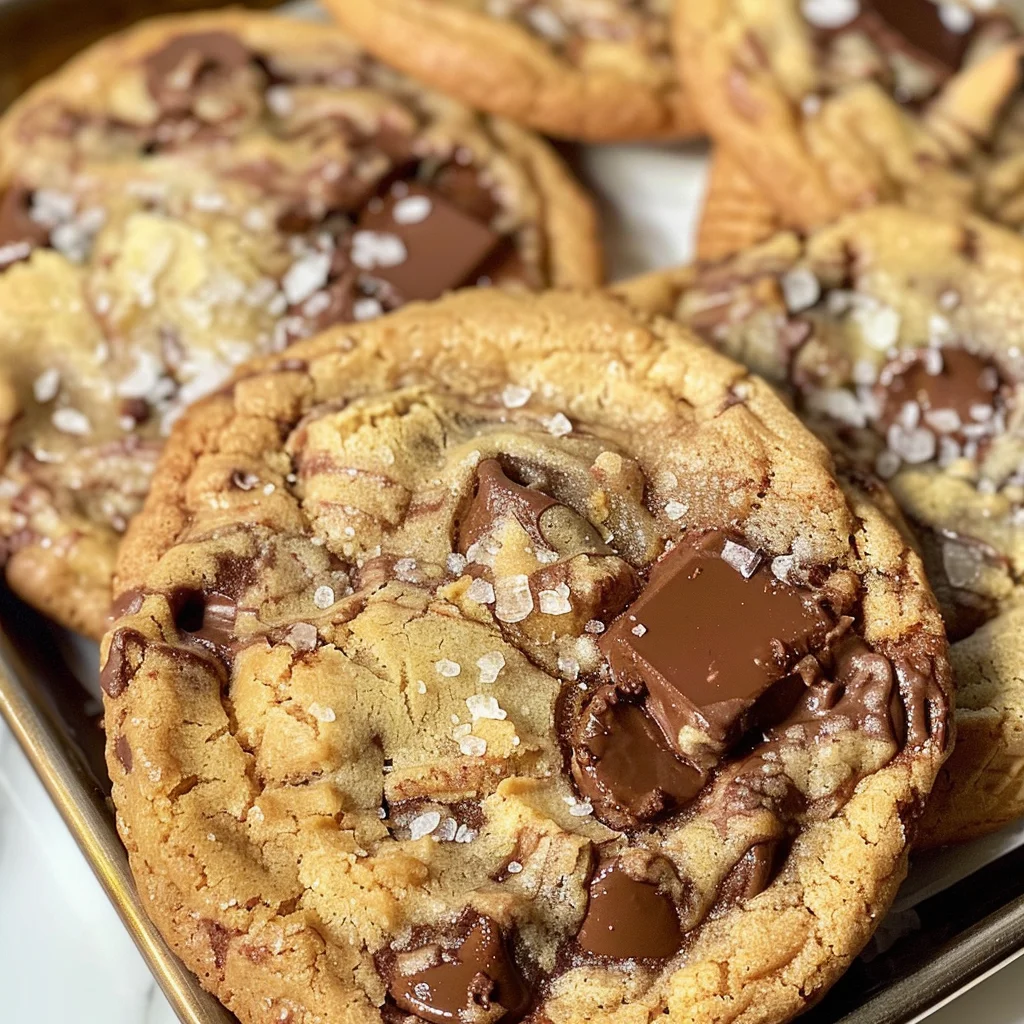
These ice cream cone cookies are perfect for meal prep and can easily be made ahead of time. Whether you want to enjoy them later or share with friends, here’s how to keep them fresh.
Storing Leftovers
- Store the cookies in an airtight container at room temperature for up to 3 days.
- For longer freshness, place parchment paper between layers of cookies to prevent sticking.
Freezing
- Allow the cookies to cool completely before freezing.
- Place them in a single layer on a baking sheet and freeze until solid.
- Transfer the frozen cookies to an airtight container or freezer bag. They can be frozen for up to 3 months.
Reheating
- To enjoy warm cookies, preheat your oven to 350°F (175°C).
- Place the cookies on a baking sheet and heat for about 5-7 minutes until warmed through.
FAQs
Can I make Ice Cream Cone Cookies gluten-free?
Yes! You can substitute all-purpose flour with a gluten-free flour blend, ensuring it’s suitable for baking.
How do I store Ice Cream Cone Cookies?
Store your ice cream cone cookies in an airtight container at room temperature for up to 3 days or freeze for longer storage.
Can I add different toppings to Ice Cream Cone Cookies?
Absolutely! Feel free to experiment with nuts, sprinkles, or even different flavored fudge to customize your cookies.
What makes Ice Cream Cone Cookies chewy?
The combination of butter and sugars creates a chewy texture, while the addition of ice cream cones adds a delightful crunch!
Final Thoughts
These ice cream cone cookies are not just a treat; they’re a delightful way to bring back childhood memories of summer days spent enjoying ice cream. I truly hope you enjoy making these as much as I do! They’re perfect for any occasion, so gather your loved ones and create some sweet moments together. Happy baking!
Ice Cream Cone Cookies

Ice Cream Cone Cookies are a delightful twist on a classic treat, combining the best elements of cookies and ice cream cones into one fun dessert. These chewy cookies are packed with chocolate chips and crunchy bits of ice cream cones, swirled with rich hot fudge for an irresistible flavor experience. Perfect for busy weeknights or family gatherings, these cookies can be customized with your favorite mix-ins, making them a versatile favorite in any kitchen. Whether enjoyed fresh from the oven or stored for later, Ice Cream Cone Cookies will surely bring smiles to everyone in the family.
- Prep Time: 15 minutes
- Cook Time: 13 minutes
- Total Time: 28 minutes
- Yield: Approximately 12 cookies 1x
- Category: Dessert
- Method: Baking
- Cuisine: American
Ingredients
- ½ cup butter
- ¾ cup brown sugar
- ¼ cup granulated sugar
- 1 large egg
- 2 tsp vanilla extract
- ½ tsp baking powder
- ½ tsp baking soda
- ½ tsp salt
- 1½ cups all-purpose flour
- ½ cup chocolate chips
- 2 sugar or waffle cones (broken into pieces)
- 3 tbsp hot fudge (chilled or frozen)
- Flaked salt for topping
Instructions
- Preheat your oven to 375°F (190°C).
- In a stand mixer, beat together butter and sugars on medium-high speed until light and fluffy.
- Add egg and vanilla; mix on low until combined.
- Gradually incorporate baking powder, baking soda, salt, and flour, mixing until just combined.
- Gently fold in chocolate chips and broken ice cream cones; add hot fudge and swirl gently.
- Scoop dough onto lined baking sheets, leaving space between each cookie.
- Sprinkle flaked salt on top and bake for 11-14 minutes until golden brown.
Nutrition
- Serving Size: 1 cookie (40g)
- Calories: 180
- Sugar: 12g
- Sodium: 90mg
- Fat: 8g
- Saturated Fat: 5g
- Unsaturated Fat: 3g
- Trans Fat: 0g
- Carbohydrates: 24g
- Fiber: 1g
- Protein: 2g
- Cholesterol: 15mg