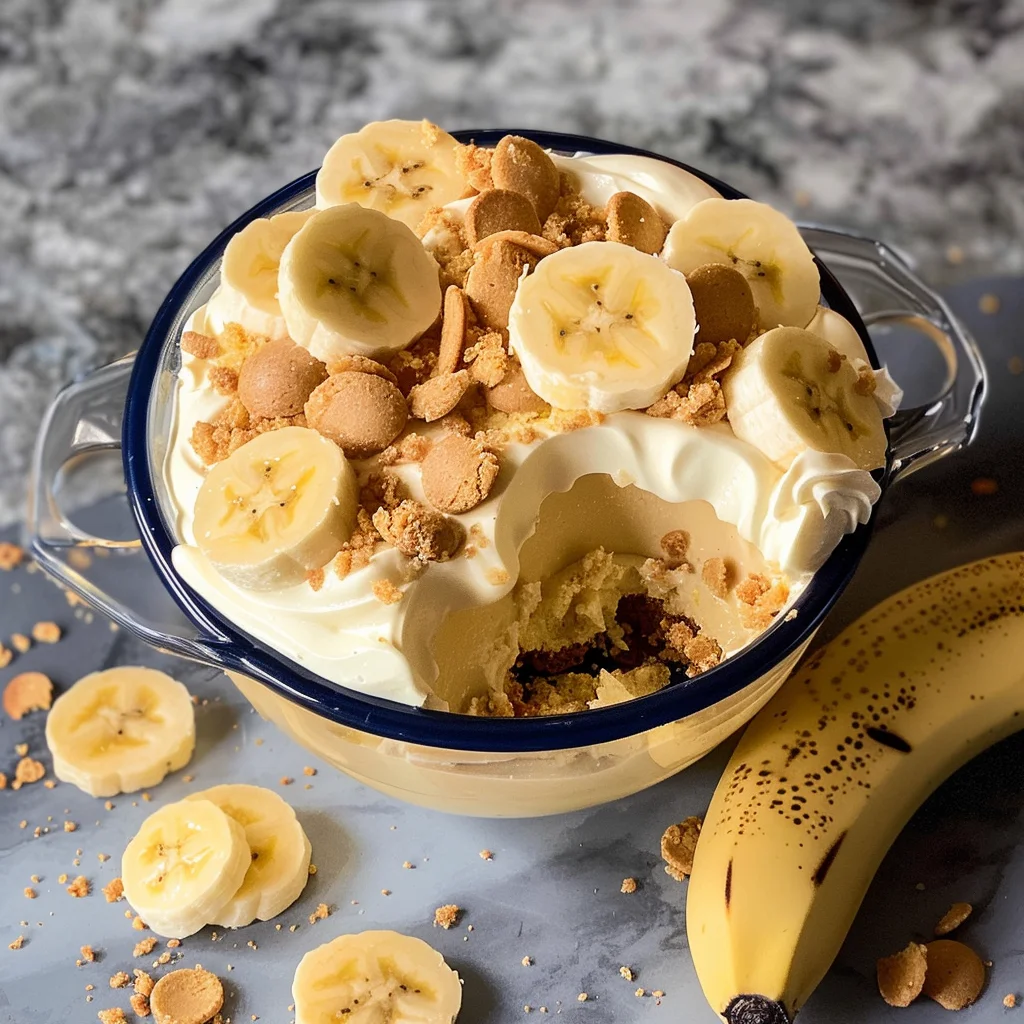
If you’re looking for a dessert that’s as comforting as a warm hug, this No Bake Banana Pudding is the answer! It’s one of those recipes that brings back all the nostalgic flavors of childhood, with layers of creamy pudding, fresh bananas, and delightful Nilla Wafers. Perfect for busy weeknights or family gatherings, this easy treat will have everyone asking for seconds. Plus, it requires no baking, making it a go-to choice for any occasion!
Why You’ll Love This Recipe
- Super Simple Preparation: With just a few easy steps and no need for an oven, you can whip this up in no time!
- Family-Friendly Delight: Kids and adults alike will love the sweet banana flavor combined with creamy pudding.
- Make-Ahead Convenience: Prepare it in advance and let it chill — perfect for potluck dinners or holiday celebrations.
- Endless Variability: Customize it with your favorite toppings or add-ins to make it uniquely yours.
- Light Yet Satisfying: This dessert feels indulgent but keeps you feeling light and happy after your meal.
Ingredients You’ll Need
You’ll find that the ingredients for this No Bake Banana Pudding are simple and wholesome. They come together to create a delightful dessert that’s sure to please everyone.
For the Pudding Layers
- 5.1 oz vanilla instant pudding
- 3 cups cold milk
- 8 oz Cool Whip
For the Assembly
- 3 large bananas (thinly sliced, or 4 medium)
- 1 box Nilla Wafer cookies
- Additional bananas for garnish if desired
Variations
This No Bake Banana Pudding is wonderfully flexible, allowing you to tailor it to your preferences or dietary needs. Here are some fun variation ideas:
- Go Vegan: Substitute non-dairy whipped topping and almond milk for a plant-based version that’s just as delicious.
- Add Some Crunch: Toss in some chopped nuts like walnuts or pecans between the layers for added texture.
- Mix Up the Flavors: Try using chocolate pudding instead of vanilla for a rich twist on the classic flavor.
- Infuse with Spice: A sprinkle of cinnamon or nutmeg can elevate the taste and add warmth to this delightful dessert.
How to Make No Bake Banana Pudding
Step 1: Prepare the Pudding Mixture
Start by mixing the vanilla instant pudding with cold milk in a large mixing bowl. Stir until everything is well combined and starts to thicken. This step is crucial because it forms the base of your creamy layers.
Step 2: Add Whipped Topping
Next, gently fold in half of the Cool Whip. This adds lightness and fluffiness to your pudding mixture, which makes each bite so much more enjoyable.
Step 3: Layer the Cookies
In a 9 x 13 baking dish, arrange a layer of Nilla Wafer cookies. These will provide a lovely crunch that complements the creaminess of the pudding.
Step 4: Add Bananas
After laying down your cookies, add a layer of thinly sliced bananas on top. The bananas not only add sweetness but also bring freshness to every spoonful!
Step 5: Spoon on Pudding
Now it’s time to spoon half of your pudding mixture over those banana slices. Use a spatula to spread it evenly — this ensures every bite is packed with flavor!
Step 6: Repeat Layers
Repeat the layering process with another set of cookies followed by more banana slices, finishing off with another layer of pudding on top. This creates those beautiful stripes when you serve!
Step 7: Top with Whipped Cream
Spread the remaining Cool Whip over your final layer of pudding. This fluffy topping adds an irresistible finish that’s hard to resist.
Step 8: Chill Before Serving
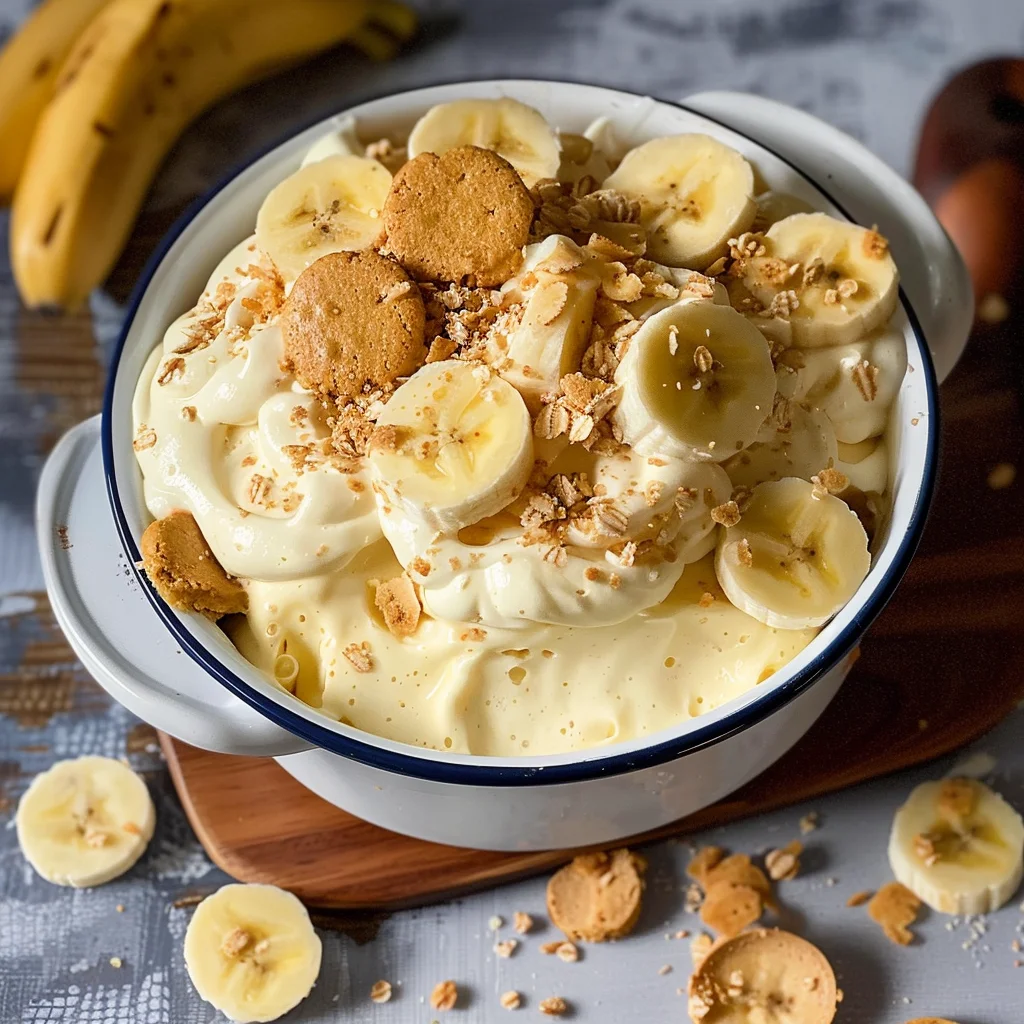
Place your masterpiece in the refrigerator for at least two hours (or overnight if you can wait!). Chilling allows all those flavors to meld beautifully together. Before serving, feel free to garnish with additional banana slices and crushed cookies for that extra touch!
Pro Tips for Making No Bake Banana Pudding
To ensure your No Bake Banana Pudding turns out perfectly every time, keep these helpful tips in mind!
- Use cold milk: Starting with cold milk helps the pudding mix set properly and ensures a creamy texture.
- Layer thoughtfully: Alternate your layers of cookies, bananas, and pudding evenly to create a beautiful presentation and balanced flavor in every bite.
- Choose ripe bananas: Selecting ripe but firm bananas enhances the sweetness and flavor without being overly mushy in the dessert.
- Refrigerate longer if possible: Allowing the pudding to chill overnight not only helps it set better but also allows the flavors to meld beautifully.
- Consider cookie alternatives: If you can’t find Nilla Wafers, any vanilla wafer or cookie will work; just ensure they stay crunchy for a delightful texture.
How to Serve No Bake Banana Pudding
Serving your No Bake Banana Pudding can be as fun as making it! Here are some ideas to enhance the experience.
Garnishes
- Fresh mint leaves: A pop of green adds freshness and a touch of elegance to your dessert presentation.
- Crushed Nilla Wafers: Sprinkling crushed cookies on top gives a delightful crunch that complements the creamy layers beneath.
- Chocolate shavings: For a bit of decadence, add chocolate shavings on top for a rich contrast to the banana flavor.
Side Dishes
- Fruit salad: A light fruit salad brings balance with its fresh flavors and offers a healthy complement to the richness of the pudding.
- Whipped cream: Serving additional whipped cream alongside allows everyone to customize their dessert with extra creaminess.
- Coffee or tea: A warm beverage like coffee or herbal tea pairs nicely, offering a cozy end to your meal while balancing the sweetness of the pudding.
- Cheese platter: A cheese platter can provide savory bites that contrast wonderfully with the sweet dessert, making for an enjoyable meal spread.
Make Ahead and Storage
This No Bake Banana Pudding is perfect for meal prep, allowing you to whip it up in advance for gatherings or a sweet treat throughout the week.
Storing Leftovers
- Store any leftovers in an airtight container in the refrigerator.
- Enjoy within 3-5 days for the best flavor and texture.
Freezing
- It’s not recommended to freeze No Bake Banana Pudding as the texture may change upon thawing.
- If you do choose to freeze, assemble without bananas and Cool Whip and freeze. Add fresh ingredients after thawing.
Reheating
- This dessert is served cold, so no reheating is necessary.
- Simply take it out of the fridge when ready to serve.
FAQs
Can I make No Bake Banana Pudding ahead of time?
Absolutely! This recipe is great for making ahead. Just prepare it a few hours or even a day in advance, letting it chill in the refrigerator until you’re ready to serve.
How long does No Bake Banana Pudding last?
When stored properly in an airtight container, No Bake Banana Pudding can last 3-5 days in the fridge. Enjoy it while it’s fresh!
What can I substitute for Nilla Wafers in this No Bake Banana Pudding?
You can use graham crackers or even gluten-free cookies if you prefer! They will provide a delicious alternative while maintaining that classic pudding flavor.
Final Thoughts
No Bake Banana Pudding holds a special place in many hearts with its creamy layers and delightful banana flavor. It’s a simple yet satisfying dessert that brings joy to any occasion. I hope you enjoy making this sweet treat as much as I do! Don’t hesitate to share it with friends and family—you’ll surely make their day a little brighter!
No Bake Banana Pudding
No Bake Banana Pudding is the ultimate nostalgic dessert that combines creamy layers of pudding, fresh bananas, and crunchy Nilla Wafers—all without turning on the oven! This delightful treat is incredibly easy to prepare, making it a perfect choice for busy weeknights or family gatherings. Each spoonful is a comforting reminder of childhood sweetness, ensuring everyone will be asking for seconds. Plus, it’s make-ahead friendly, allowing the flavors to meld beautifully as it chills in the refrigerator. Get ready to impress your loved ones with this simple yet satisfying dessert that is sure to bring smiles all around!
- Prep Time: 20 minutes
- Cook Time: N/A
- Total Time: 0 hours
- Yield: Approximately 12 servings 1x
- Category: Dessert
- Method: No Bake
- Cuisine: American
Ingredients
- 5.1 oz vanilla instant pudding
- 3 cups cold milk
- 8 oz Cool Whip
- 3 large bananas (thinly sliced)
- 1 box Nilla Wafer cookies
Instructions
- In a large mixing bowl, whisk together vanilla instant pudding and cold milk until well combined and thickened.
- Gently fold in half of the Cool Whip until light and fluffy.
- Layer Nilla Wafer cookies in a 9 x 13 baking dish.
- Add a layer of thinly sliced bananas over the cookies.
- Spoon half of the pudding mixture over the bananas, spreading evenly.
- Repeat layering with more cookies, bananas, and finish with remaining pudding mixture.
- Top with remaining Cool Whip.
- Chill in the refrigerator for at least two hours or overnight before serving.
Nutrition
- Serving Size: 1 serving
- Calories: 210
- Sugar: 18g
- Sodium: 150mg
- Fat: 9g
- Saturated Fat: 5g
- Unsaturated Fat: 4g
- Trans Fat: 0g
- Carbohydrates: 32g
- Fiber: 1g
- Protein: 3g
- Cholesterol: 10mg