If you’re looking for a dessert that will make everyone smile, this Butterfinger Pie with Peanut Butter is just the ticket! It’s a creamy, no-bake delight that pairs the rich taste of peanut butter with the irresistible crunch of Butterfinger candy bars. This pie is perfect for busy weeknights when you crave something special or for family gatherings where you want to impress your loved ones.
What makes this pie truly special is how simple it is to whip up. With just a handful of ingredients and minimal prep time, you’ll have a dessert that’s not only delicious but also a crowd favorite. Whether it’s a birthday celebration or just a sweet treat after dinner, this pie will quickly become a cherished recipe in your home!
Why You’ll Love This Recipe
- Easy to Make: With no baking required, this pie comes together quickly, making it ideal for last-minute gatherings.
- Family-Friendly: Kids and adults alike will love the combination of creamy peanut butter and crunchy candy.
- Make-Ahead Delight: Prepare it in advance and let it chill; it’s ready when you are!
- Decadent Flavor: The blend of flavors creates a rich dessert experience that’s sure to satisfy any sweet tooth.
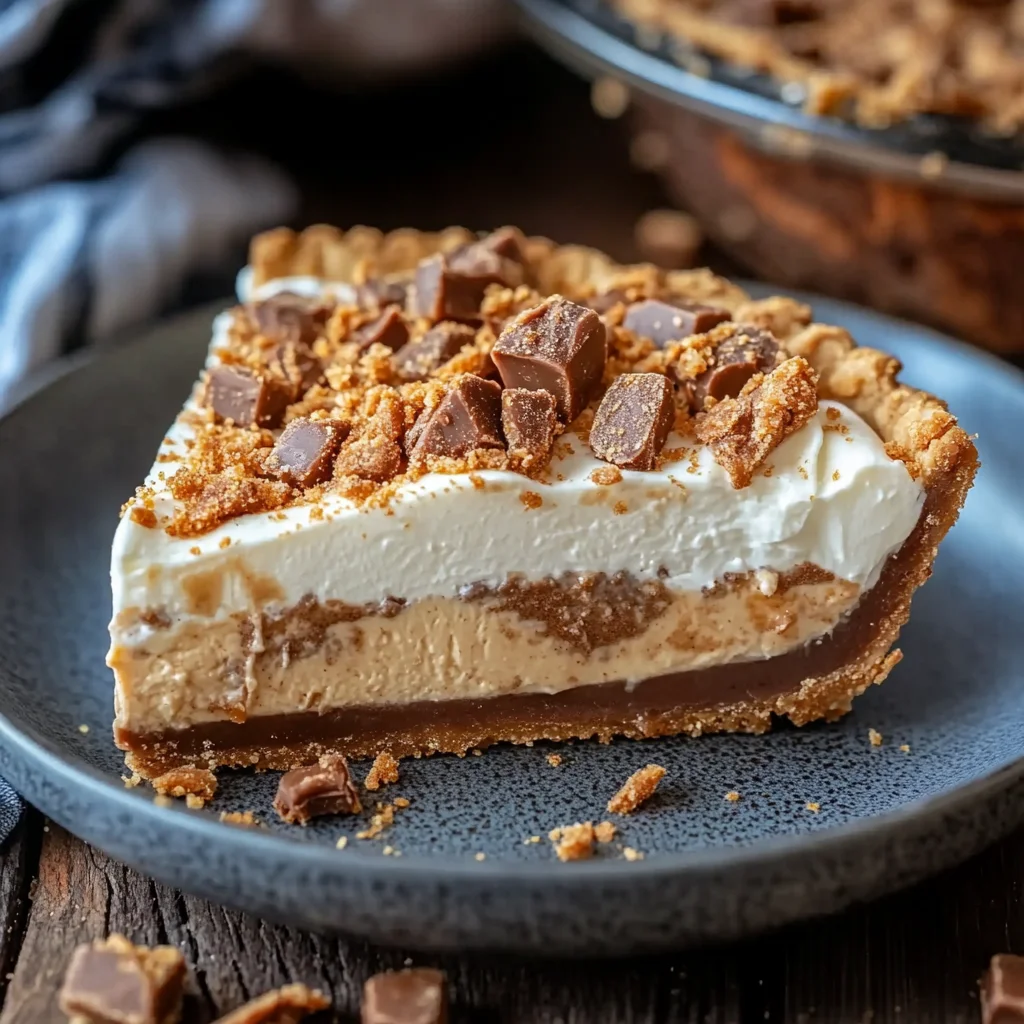
Ingredients You’ll Need
You’ll be delighted to know that these ingredients are simple and wholesome! They come together beautifully to create a luscious filling and tasty crust that everyone will adore.
- 2 cups graham cracker crumbs
- 1/2 cup unsalted butter, melted (1 stick)
- 1 cup creamy peanut butter
- 8 oz cream cheese, softened
- 1 cup powdered sugar
- 1 tsp vanilla extract
- 8 oz whipped topping (like Cool Whip, thawed)
- 4 Butterfinger candy bars (2.1 oz each, crushed plus extra for topping)
Variations
This recipe is incredibly flexible, allowing you to get creative while still enjoying that classic flavor. Here are some fun variation ideas:
- Change the Crust: Swap graham cracker crumbs for crushed Oreos or gluten-free cookies for a different base.
- Peanut Butter Twist: Use crunchy peanut butter instead of creamy for an added texture contrast.
- Add Some Spice: Mix in a pinch of cinnamon or cayenne pepper into the filling for an unexpected kick!
- Healthy Alternative: Substitute whipped topping with coconut whipped cream for a lighter version.
How to Make Butterfinger Pie with Peanut Butter
Step 1: Prepare the Crust
In a medium bowl, mix together the graham cracker crumbs and melted butter until they’re well combined. Press this mixture firmly into the bottom and up the sides of a 9-inch pie dish. Refrigerating it while you make the filling helps set the crust nicely, giving it that perfect crunch when served.
Step 2: Make the Filling
In a large bowl, beat together the creamy peanut butter and softened cream cheese until smooth—about two minutes should do it! This step is crucial as it ensures your filling is rich and creamy without any lumps. Next, add in the powdered sugar and vanilla extract, mixing until everything is well combined and deliciously creamy.
Step 3: Fold in Whipped Topping
Gently fold in the whipped topping into the peanut butter mixture until just combined. Be careful not to overmix here; you want to keep that light and airy texture that makes this pie so delightful!
Step 4: Add Butterfinger Pieces
Crush three of those delicious Butterfinger bars (saving one for topping) and fold them into your peanut butter mixture. This adds an incredible crunch and flavor burst throughout your filling—simply divine!
Step 5: Assemble the Pie
Pour that luscious filling into your prepared crust, smoothing out the top with a spatula. This step ensures an even layer of deliciousness awaits each slice!
Step 6: Add Topping
Crush up your remaining Butterfinger bar and sprinkle it evenly over the top of your pie. Not only does this add an extra layer of flavor, but it also gives your pie that beautiful finish that’s so appealing!
Step 7: Chill
Refrigerate your pie for at least four hours—or overnight if you can wait! This chilling time allows everything to set perfectly so each slice comes out beautifully.
Step 8: Serve
When you’re ready to indulge, slice your pie and enjoy! For clean cuts, dip your knife in hot water before slicing—it really makes all the difference!
Pro Tips for Making Butterfinger Pie with Peanut Butter
Creating the perfect Butterfinger Pie with Peanut Butter is all about attention to detail. Here are some pro tips to help you achieve dessert perfection!
Use room temperature ingredients: Bringing your cream cheese and peanut butter to room temperature ensures a smooth filling without lumps, making it easier to mix and creating a creamier texture.
Don’t overmix the whipped topping: Gently folding in the whipped topping helps maintain its lightness and volume, ensuring your pie has a fluffy consistency that melts in your mouth.
Chill longer for best results: While 4 hours is the minimum, chilling the pie overnight enhances the flavors and allows the filling to set perfectly, giving you cleaner slices when serving.
Crush Butterfingers evenly: When crushing your Butterfinger bars, aim for a mix of fine crumbs and larger chunks. This gives your pie delightful texture throughout while still delivering that signature crunch on top.
How to Serve Butterfinger Pie with Peanut Butter
Presenting your Butterfinger Pie can elevate the entire dessert experience! Here are some ideas to make it truly special.
Garnishes
- Whipped cream: A dollop of whipped cream on each slice adds an extra layer of creaminess that complements the peanut butter flavor beautifully.
- Chocolate drizzle: A simple drizzle of chocolate sauce over the top not only enhances visual appeal but also adds an indulgent touch that chocolate lovers will appreciate.
Side Dishes
- Fresh fruit salad: The lightness and acidity of fresh fruits balance the richness of the pie, providing a refreshing contrast that cleanses the palate.
- Vanilla ice cream: A scoop of vanilla ice cream alongside each slice offers a classic pairing, creating a deliciously creamy and cool combination.
- Coffee or espresso: Serving a small cup of coffee or espresso alongside your pie enhances its flavors and provides a lovely finishing touch after dessert.
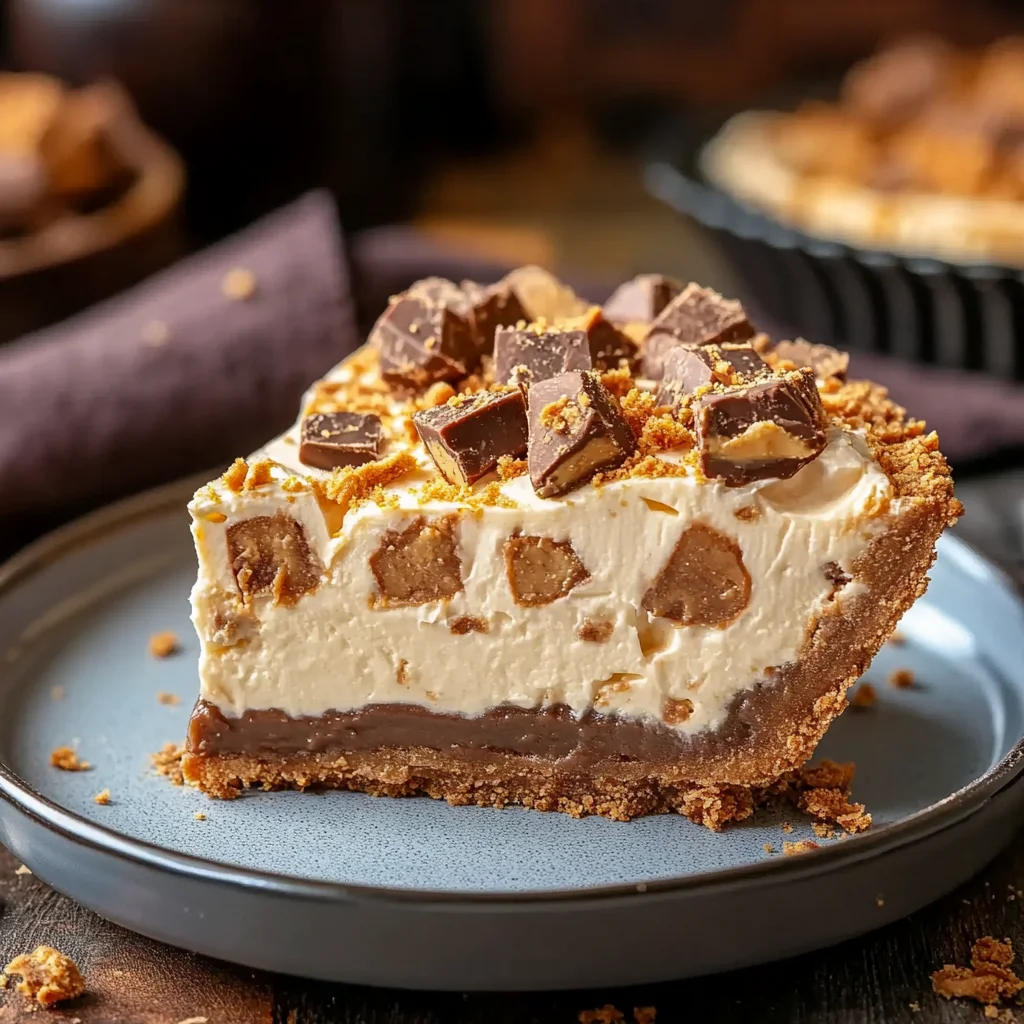
Make Ahead and Storage
This Butterfinger Pie with Peanut Butter is perfect for meal prep! You can make it ahead of time, allowing the flavors to meld beautifully while giving you more time to enjoy with friends and family.
Storing Leftovers
- Store any leftover pie in an airtight container in the refrigerator.
- It will keep well for up to 3 days.
- If your pie has been cut, cover the exposed edges with plastic wrap to maintain freshness.
Freezing
- To freeze, wrap the pie tightly in plastic wrap and then in aluminum foil.
- It can be frozen for up to 2 months.
- Thaw overnight in the refrigerator before serving.
Reheating
- This pie is best enjoyed chilled and does not require reheating.
- If you prefer a softer texture, let it sit at room temperature for about 15-20 minutes before serving.
FAQs
Can I use crunchy peanut butter in this Butterfinger Pie with Peanut Butter?
Yes, you can absolutely use crunchy peanut butter if you prefer some extra texture in your pie. Just keep in mind that it may alter the creaminess slightly.
How long does Butterfinger Pie with Peanut Butter need to chill?
For optimal results, chill the pie for at least 4 hours or overnight. This allows it to set properly and enhances the flavor!
Can I substitute other candy bars for Butterfinger?
Definitely! While Butterfinger adds a unique crunch and flavor, feel free to experiment with other chocolate or candy bar options that you enjoy.
Is this recipe suitable for gluten-free diets?
You can make this recipe gluten-free by using gluten-free graham cracker crumbs. Just check the labels on all ingredients to ensure they meet your dietary needs.
Final Thoughts
This Butterfinger Pie with Peanut Butter is a delightful treat that combines rich flavors and textures, making it a standout dessert for any occasion. I hope you enjoy making it as much as I do! Don’t hesitate to share your experience or variations—happy baking!
Butterfinger Pie with Peanut Butter

Indulge in the deliciousness of this Butterfinger Pie with Peanut Butter, a no-bake dessert that will charm your family and friends alike. This creamy delight combines the rich flavors of peanut butter and cream cheese, enhanced by the delightful crunch of crushed Butterfinger candy bars. Perfect for any occasion, whether it’s a birthday party or a cozy family dinner, this pie is not only easy to make but also a guaranteed crowd-pleaser. With its simple ingredients and quick preparation, you can whip it up in no time, allowing you to focus on enjoying the moment with loved ones rather than spending hours in the kitchen. Chill it in advance for optimal flavor development, and watch as it quickly becomes a cherished favorite in your home.
- Prep Time: 20 minutes
- Cook Time: None
- Total Time: 0 hours
- Yield: Serves 10 1x
- Category: Dessert
- Method: No-bake
- Cuisine: American
Ingredients
- 2 cups graham cracker crumbs
- 1/2 cup unsalted butter, melted
- 1 cup creamy peanut butter
- 8 oz cream cheese, softened
- 1 cup powdered sugar
- 1 tsp vanilla extract
- 8 oz whipped topping, thawed
- 4 Butterfinger candy bars, crushed
Instructions
- Prepare the crust by mixing graham cracker crumbs with melted butter; press into a 9-inch pie dish and refrigerate.
- In a bowl, blend peanut butter and cream cheese until smooth. Add powdered sugar and vanilla; mix well.
- Gently fold whipped topping into the mixture until combined.
- Fold in three crushed Butterfinger bars; pour filling into the crust.
- Sprinkle remaining crushed Butterfinger on top; chill for at least 4 hours or overnight.
- Slice and serve cold.
Nutrition
- Serving Size: 1 serving
- Calories: 320
- Sugar: 18g
- Sodium: 250mg
- Fat: 20g
- Saturated Fat: 10g
- Unsaturated Fat: 9g
- Trans Fat: 0g
- Carbohydrates: 30g
- Fiber: 2g
- Protein: 5g
- Cholesterol: 25mg